

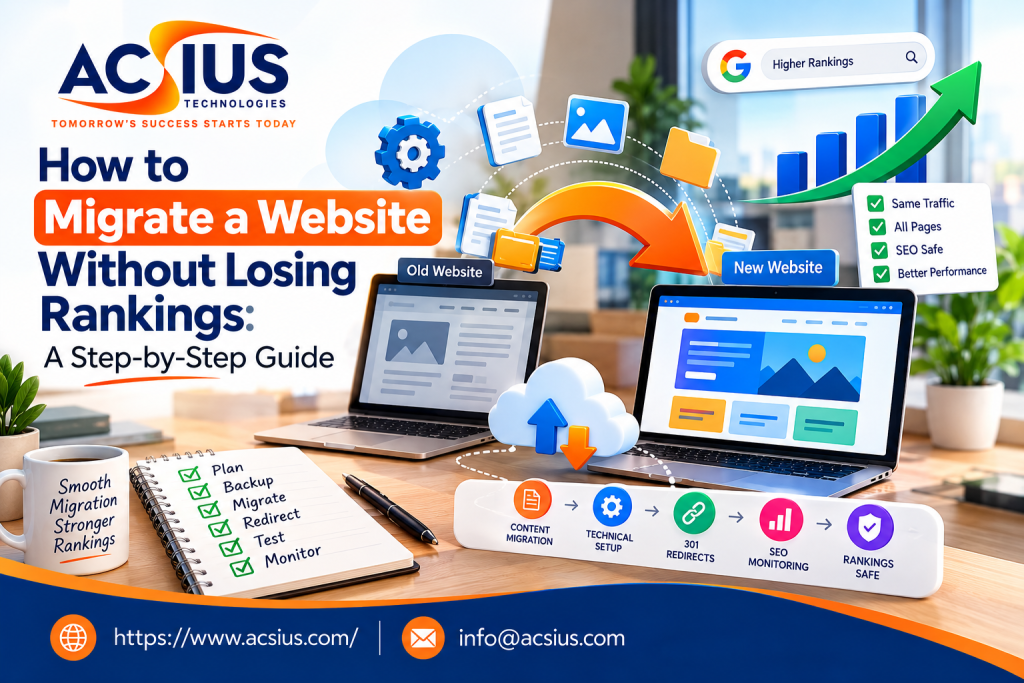
Few projects make business owners as nervous as a website migration. You may be changing your domain, moving to a new platform, switching hosting, redesigning your structure, or moving from HTTP to HTTPS. Whatever the reason, the fear is the same: after launch, traffic drops, rankings vanish, and leads dry up. Stories of sites losing half their organic traffic overnight are common, and almost all of them trace back to avoidable mistakes.
The good news is that a migration does not have to hurt your SEO. When you plan carefully, map every important URL, test before launch, and monitor closely afterward, most sites recover quickly and many even grow. This step-by-step guide explains exactly how to migrate a website without losing rankings, from the first audit to the final post-launch checks, with practical checklists you can use on your own project.
What Is a Website Migration and Why Does It Put Rankings at Risk?
A website migration is any major change that affects how search engines find, crawl, and understand your site. Common types include:
- Domain change: moving from olddomain.com to newdomain.com, often because of rebranding.
- Platform or CMS change: moving from one system to another, such as from a custom build to WordPress or Shopify.
- HTTP to HTTPS: adding a security certificate and changing every URL.
- Hosting or server change: moving to a new host or infrastructure.
- Structure or URL change: reorganizing categories, changing slugs, or merging sections.
- Redesign: changing layout, navigation, and content, even if URLs remain the same.
Rankings are at risk because search engines have spent months or years learning your old pages. When URLs change without proper instructions, Google sees brand-new pages with no history, while the old pages return errors. Backlinks pointing to old URLs stop passing value, internal links break, and content that once ranked may disappear or change. A careful plan tells search engines exactly what moved where, so the signals you have built carry over.
Step 1: Define the Goals and Scope of the Migration
Before touching anything, write down what is changing and why. Be specific. Are you only moving servers, or also changing URLs? Will content be rewritten? Will the design and navigation change? The more elements you change at once, the greater the risk, because it becomes harder to identify what caused any drop.
Where possible, avoid combining many major changes in a single launch. For example, if you need a new domain and a redesign, consider doing them in separate phases. Set measurable goals too, such as maintaining at least 95 percent of organic traffic within 30 days, or improving page speed while keeping rankings stable.
Assign owners for each part: SEO, development, content, design, and analytics. Agree on a launch date that avoids your busiest season, and leave time for testing. Rushed migrations are the ones that fail.
Step 2: Benchmark Your Current Performance
You cannot judge success without a baseline. Record the following before you change anything:
- Organic traffic and conversions from your analytics tool, for at least the last 12 months to account for seasonality.
- Impressions, clicks, and average positions from Google Search Console.
- Rankings for your most valuable keywords.
- Number of indexed pages and crawl stats.
- Page speed and Core Web Vitals scores.
- Backlink profile, including your top linked pages.
Export this data and store it safely. After launch, you will compare it with new results to spot problems quickly. Take screenshots of key pages too, so you can confirm design and content details later.
Step 3: Crawl and Inventory Every URL
Use a site crawler to capture every URL on your current website: pages, posts, images, PDFs, category pages, and parameter-based URLs. Export the list with titles, Meta descriptions, headings, status codes, canonical tags, word counts, and internal link counts.
Then add data from other sources: Search Console (pages with impressions), analytics (pages with traffic), and your backlink tool (pages with links). Combine them into one master spreadsheet. A URL that is missing from your crawl but still earns links or traffic is easy to forget, and forgetting it means losing value.
This inventory becomes the foundation of your redirect plan, your content decisions, and your post-launch checks. If your site is large or complex, getting professional SEO Services India support at this stage can save weeks of work, because specialists know how to merge crawl, traffic, and link data into a clean migration blueprint and spot hidden risks early.
Step 4: Decide What to Keep, Improve, Merge, or Remove
A migration is a good opportunity to clean up, but be careful. Review each URL and assign one of four decisions:
- Keep: pages that perform well and fit your future structure. Preserve their content, headings, and URLs wherever possible.
- Improve: pages with potential, such as those ranking on page two. Update them after the migration is stable, not during it, to avoid mixing variables.
- Merge: thin or overlapping pages that target the same topic. Combine them into one stronger page and redirect the old URLs to it.
- Remove: pages with no traffic, no links, and no value. Return a 410 or redirect them to the closest relevant page.
Resist the urge to delete content simply because it looks old. Pages with backlinks or steady traffic deserve protection, even if they need updating later.
Step 5: Build Your Redirect Map
The redirect map is the most important document in any migration. It lists every old URL and the exact new URL it should point to. Use permanent 301 redirects, which tell search engines the move is permanent and help pass signals to the new location.
Follow these rules:
- Map one to one. Send each old page to its closest equivalent, not to the homepage. Redirecting everything to the homepage is treated like a soft error and wastes link value.
- Avoid redirect chains. Old URL to new URL directly, never old to interim to new. Chains slow crawling and can lose signals.
- Avoid loops. Test that no URL redirects back to itself in a circle.
- Cover variations. Include www and non-www versions, trailing slash versions, HTTP and HTTPS versions, and parameter URLs that earn traffic.
- Keep redirects live. Maintain them for at least a year, and longer for high-value URLs with backlinks.
If your URLs follow a pattern, such as /blog/post-name changing to /resources/post-name, you can use rule-based redirects. For unique pages, create individual entries. Test a sample of mappings in a staging environment before launch.
Step 6: Prepare and Test on a Staging Site
Build the new site in a staging environment that search engines cannot index. Use password protection, since a robots.txt block alone is not enough to guarantee safety. Then test everything.
Check these areas carefully:
- Content parity. Titles, Meta descriptions, headings, body text, images, alt text, and internal links should match the old versions for pages you want to keep.
- Canonical tags. Each page should point to its correct preferred URL on the new site, not to the staging domain or the old site.
- Indexing directives. Make sure no page has an accidental noindex tag. This is one of the most common and most damaging migration errors, usually caused by a staging setting that stays on at launch.
- Structured data. Confirm that schema markup for products, articles, reviews, or organizations is present and valid.
- Navigation and internal links. Menus, breadcrumbs, and links should use new URLs directly, not rely on redirects.
- Mobile experience. Test on real devices, since most traffic comes from phones.
- Speed. Compare Core Web Vitals and loading times against your baseline. A faster site helps, a slower one can hurt.
- Forms, tracking, and integrations. Confirm that analytics tags, conversion tracking, chat tools, and checkout flows work.
Crawl the staging site with the same tool you used earlier and compare it with the old inventory. Differences you did not intend are problems to fix before launch.
Step 7: Plan Your Technical SEO Setup for Launch Day
Create a launch checklist so nothing depends on memory. It should include:
- Robots.txt: replace any staging restrictions with the correct live version. Confirm that important sections are crawlable.
- XML sitemap: generate a fresh sitemap containing only canonical, indexable, 200-status URLs. Keep the old sitemap briefly available too, so Google can discover the redirects faster.
- HTTPS and security: install a valid certificate and force HTTPS across all pages.
- Canonical and hreflang tags: verify them for multilingual or multi-region sites.
- 404 page: design a helpful custom error page with search and navigation options.
- Analytics and Search Console: make sure tracking is live and the new property is verified before launch.
- Server performance: confirm hosting can handle crawl activity and traffic spikes.
If you are changing domains, set up the new domain property in Search Console in advance and prepare to use the Change of Address tool after the redirects go live. That tool tells Google about a domain move. It is not used for moves within the same domain, such as a CMS change.
Step 8: Choose the Right Launch Timing
Pick a low-traffic window for launch, such as early in the week and outside holidays or major sales periods. This gives your team time to fix issues before the busiest hours and avoids launching on a Friday when support is limited.
Make sure developers, SEO specialists, and content owners are available on launch day and the days after. Have a rollback plan ready too. If something serious breaks, such as widespread no index tags or broken redirects, you should know exactly how to restore the previous version quickly.
Step 9: Launch and Validate Immediately
Once the new site goes live, resist the urge to relax. The first hours matter. Work through this validation list:
- Test the redirects. Check a large sample of old URLs, especially top traffic and top backlinked pages, to confirm they return a 301 to the correct destination.
- Crawl the live site. Look for 404 errors, redirect chains, missing titles, duplicate content, and no index tags.
- Check robots.txt and sitemaps. Confirm they are accessible and correct.
- Submit the new sitemap in Google Search Console and request indexing of key pages.
- Review analytics. Make sure data is flowing and conversions are being recorded.
- Update key external references. Change your URLs in social profiles, email signatures, advertising campaigns, and business listings.
- Request backlink updates. Contact the highest-value sites linking to you and ask them to point to the new URLs. Redirects help, but direct links are cleaner.
Fix any critical problem immediately. Small issues can wait for a follow-up sprint, but anything blocking indexing or breaking major pages needs urgent attention.
Step 10: Monitor Rankings, Traffic, and Indexing Closely
For the first four to eight weeks, check performance often. Compare your new data with the baseline you captured earlier. Some fluctuation is normal, because search engines need time to recrawl and reprocess pages. A moderate dip during the first weeks is common, and many sites stabilize within a few weeks to a few months depending on size and complexity.
Watch for warning signs:
- A sharp drop in indexed pages or crawl activity.
- Large numbers of 404 or soft 404 errors in Search Console.
- Top landing pages losing impressions that do not recover.
- Keywords falling out of the top 20 rather than shifting slightly.
- Sudden changes in conversion rates, which may point to usability or tracking problems.
Modern tools make this monitoring easier and faster. Many businesses now work with an experienced AI SEO Company India to automate anomaly detection, analyze crawl and ranking data at scale, and spot patterns across thousands of URLs that manual checks could miss. Automation does not replace expert judgment, but it can flag problems within hours instead of weeks, which is exactly what you need after a migration.
Step 11: Fix Issues and Improve After Stabilization
Once your rankings have stabilized, you can start improving. Update thin pages, refresh outdated content, strengthen internal linking, and implement the content changes you postponed earlier. If your migration included new templates or navigation, review user behavior to see whether visitors find what they need.
Also review the following:
- Redirect performance. Replace any lingering chains and shorten long paths.
- Internal links. Update links so they point directly to final URLs.
- Backlinks. Keep requesting updates from important referring sites.
- Crawl budget. Remove unnecessary parameter URLs and low-value pages that waste crawler attention.
Special Considerations for Different Migration Types
Domain change. Keep the same URL structure where possible, redirect every old URL to its match on the new domain, use the Change of Address tool, and keep the old domain registered for at least a year, ideally longer. Never let it expire, or you risk losing redirects and links.
Platform change. Platforms often create different default URL formats, so audit slugs, trailing slashes, canonical tags, and pagination carefully. Check that metadata, schema, and image alt text carry over.
HTTP to HTTPS. Redirect all HTTP URLs to HTTPS, update canonicals and sitemaps, and fix mixed content warnings so no insecure resources load on secure pages.
Ecommerce migration. Preserve product and category URLs where possible, keep product data feeds updated, handle out-of-stock and discontinued products with sensible redirects, and test checkout and payment flows thoroughly.
Multi-location or local business migration. Local businesses must treat contact information as a ranking asset. Keep your business name, address, and phone number consistent across your site, Google Business Profile, and directories. Maintain location pages and their URLs, redirect them carefully, and update local citations after launch. A specialist local seo company India can coordinate these updates, protect your map visibility, and make sure reviews and listings continue to point to the right pages after the move.
Common Website Migration Mistakes to Avoid
- Skipping the benchmark. Without baseline data, you cannot tell what changed or why.
- Redirecting everything to the homepage. This breaks relevance and wastes link value.
- Leaving noindex or robots blocks on. A staging setting carried into production can erase your site from search results.
- Forgetting images, PDFs, and other files. Media can earn traffic and links too, so include them in your plan.
- Changing too many things at once. Large simultaneous changes make troubleshooting nearly impossible.
- Removing old redirects too early. Keep them for at least a year.
- Ignoring internal links. Leaving links that depend on redirects slows crawling and wastes equity.
- Not monitoring after launch. Many problems are fixable if caught early.
Website Migration SEO Checklist
Before launch
- Define scope and goals
- Benchmark traffic, rankings, and indexing
- Crawl and inventory all URLs
- Decide to keep, improve, merge, or remove each page
- Build and test a one-to-one redirect map
- Test the staging site for content, tags, and speed
- Prepare sitemaps, robots.txt, and tracking
Launch day
- Remove staging restrictions
- Activate redirects
- Submit sitemaps and verify Search Console
- Crawl and validate the live site
- Confirm analytics and conversion tracking
After launch
- Monitor indexing, rankings, and errors daily at first, then weekly
- Update backlinks and external profiles
- Fix issues quickly
- Improve content after stabilization
- Keep redirects live for at least a year
Final Thoughts: Plan Well, Launch Calmly
A website migration does not have to be a gamble. The sites that keep their rankings are the ones that treat the project as an SEO process rather than only a design or development task. They benchmark performance, map every URL, test thoroughly, launch carefully, and monitor results long after going live. Follow the steps above, keep your team aligned, and you will protect the traffic you have earned while giving your site a stronger foundation for future growth.
If you would like expert support planning and managing a smooth move, ACSIUS can help you audit your site, create a precise redirect strategy, handle technical checks, and monitor performance after launch so your rankings and traffic stay protected. Contact ACSIUS today to migrate with confidence and turn your new website into a stronger growth channel.
FAQs
Will I lose rankings if I use 301 redirects?
When done correctly, 301 redirects carry signals to the new URL, so major losses are unlikely. Problems usually come from missing redirects, wrong destinations, or other changes made at the same time.
Should I migrate during a busy season?
It is better to avoid peak periods. Choose a quieter time so you have room to monitor and fix issues without risking major revenue.
How long should I keep the old domain?
At least a year, and ideally longer, especially if it has strong backlinks. Letting it expire can break redirects and lose link value.
Is a temporary drop in traffic normal after migration?
Yes. A small dip in the first weeks is common while search engines recrawl and reprocess your pages. A steep, lasting drop usually points to a fixable problem such as missing redirects or accidental noindex tags.
Can I change my design and URLs at the same time?
You can, but it raises the risk because you will not know which change caused any decline. If possible, split big changes into phases, or keep URLs and content the same during a redesign.
Do I need to use Google's Change of Address tool?
Only for a domain change, such as moving from one domain to another. It is not used for platform, hosting, or HTTPS changes on the same domain. Set up 301 redirects first, then submit the change.
What is the difference between a 301 and a 302 redirect?
A 301 signals a permanent move and is the right choice for migrations. A 302 signals a temporary move, which is meant for short-term situations and is not ideal for a lasting URL change.
How do I find out which pages I must not lose?
Combine data from Google Search Console, analytics, and a backlink tool. Pages that earn traffic, impressions, conversions, or links are your priority and should be protected with accurate redirects.
Should I hire an SEO professional for a migration?
It is a good idea for large sites, domain changes, or ecommerce stores, where mistakes can be costly. An expert can build the redirect map, test the staging site, and monitor results after launch.
